Roof Replacement Done Right. Fair Price. Clean Job.
When your roof needs to come off, we handle every step, from tear-off to final walkthrough.
When a Repair Isn't Enough
Three things typically push a roof past the repair stage. Age is the first. A 25-year-old asphalt shingle roof in North Idaho has been through a lot of freeze-thaw cycles. Once granule loss becomes widespread and the underlying mat is exposed, you're not patching your way out of it. The second is spread of damage. One missing shingle is a repair. Half the roof with curling, cracking, or failing sealant strips is a replacement. The third is economics. Repeated repair bills on an old roof add up fast. At some point, a full replacement costs less than the next five years of patchwork. For the full breakdown, see our guide on roof repair vs replacement.
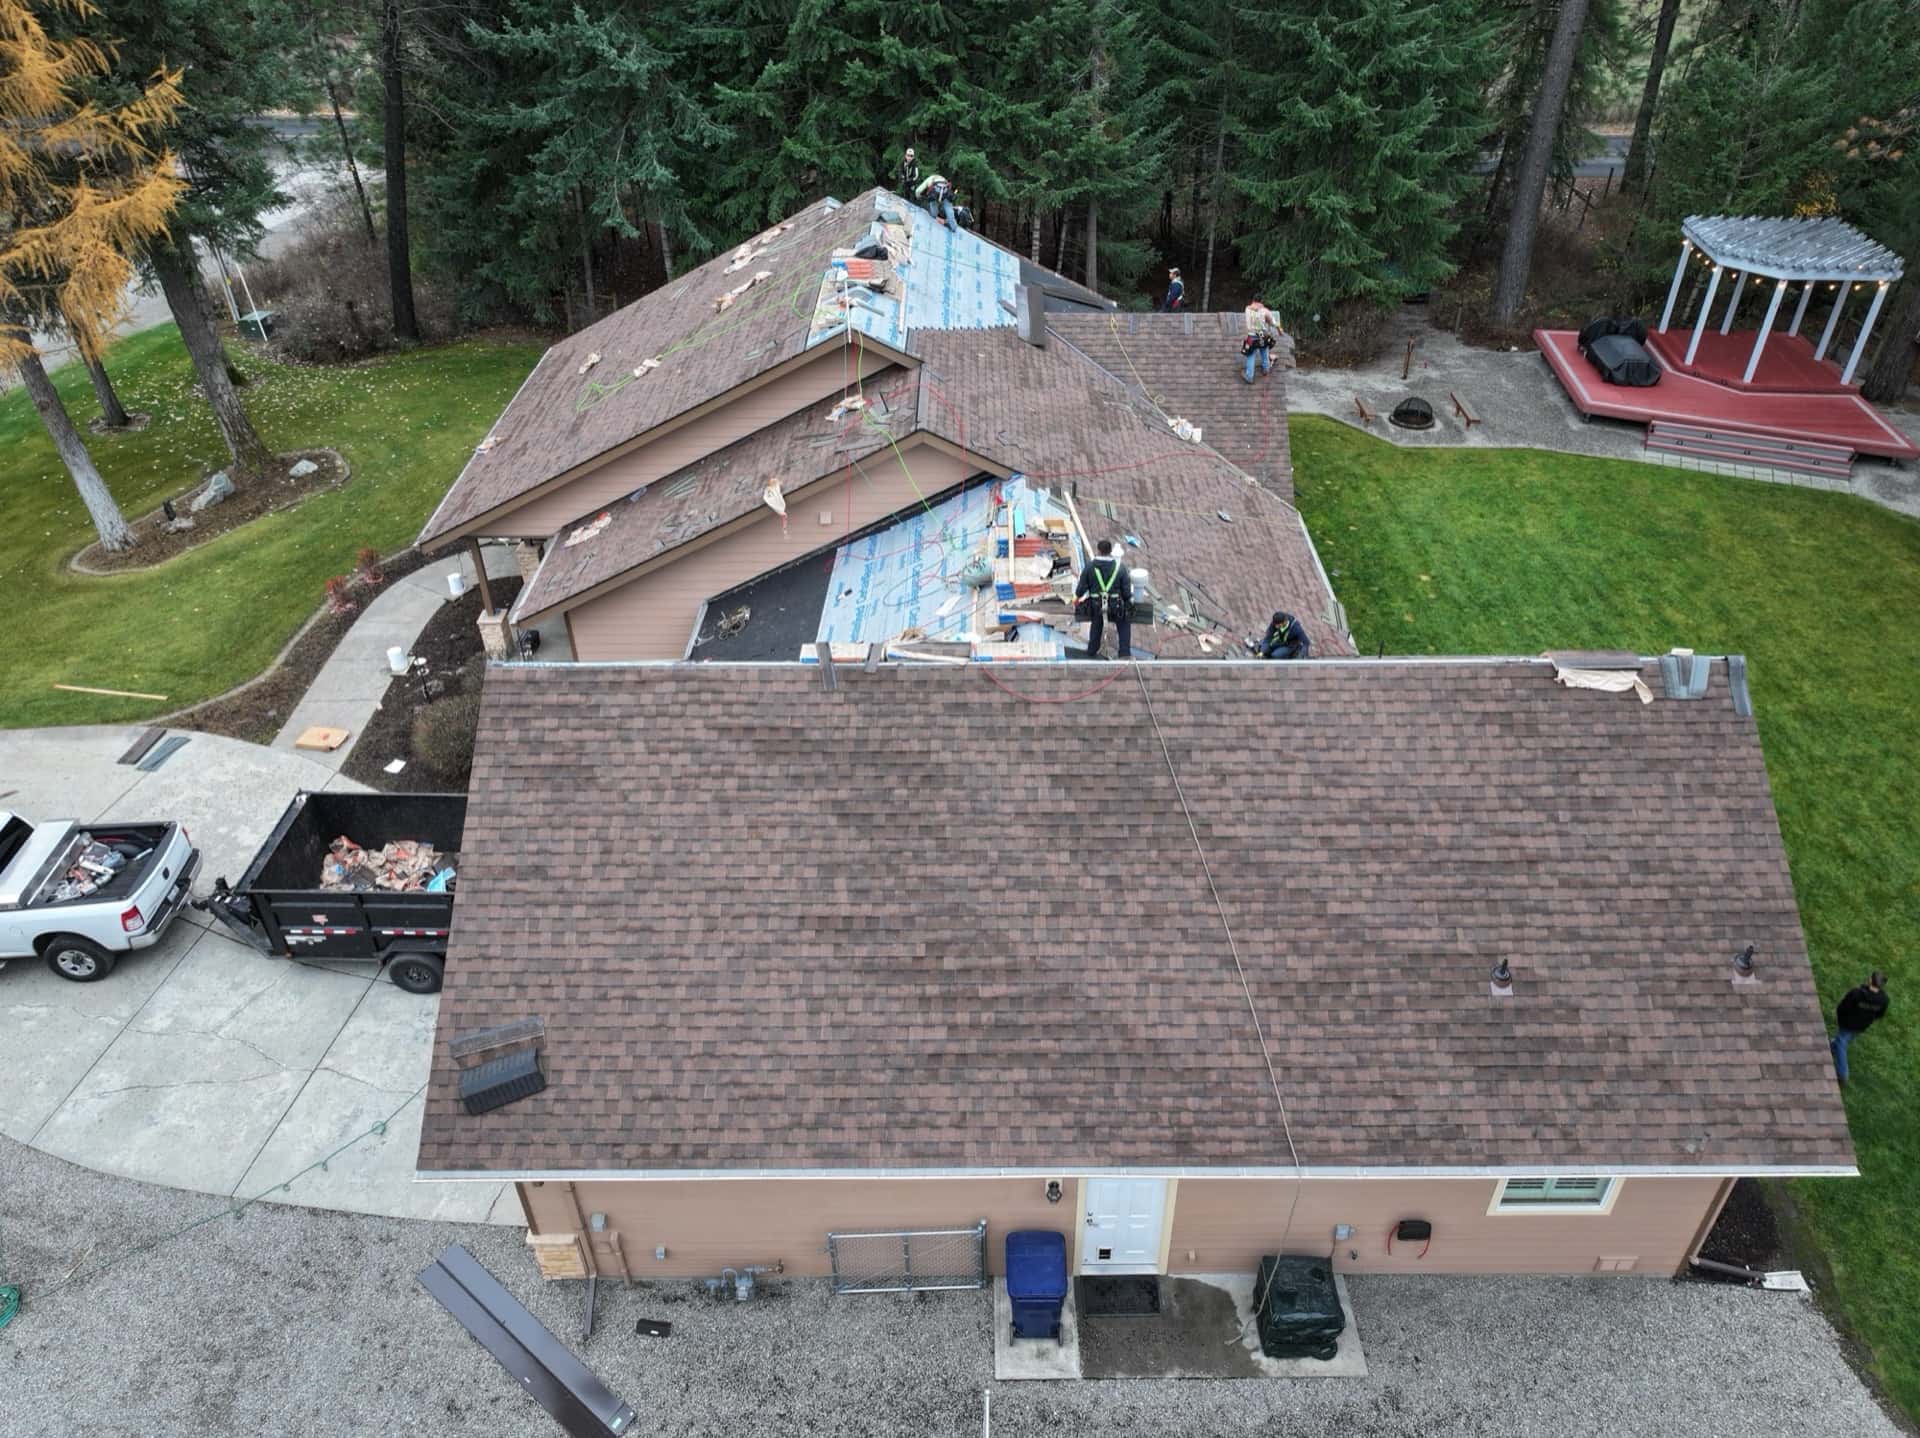
The process is straightforward. We tear off the existing material, inspect the decking for rot or damage, and address anything that needs attention before anything new goes on. Ice and water shield goes along eaves, valleys, and penetrations, especially important in North Idaho where ice dams are a real issue. Then new shingles, ridge cap, and flashing, followed by a full cleanup. Nails in the yard are not acceptable to us.
What makes the ERP approach different is simpler than you'd expect. As a CertainTeed ShingleMaster Pro company, we install CertainTeed products to the standard that backs the manufacturer warranty, not the cheapest option available. The estimate you receive is written and clear, with no verbal quotes and no surprise line items on the final invoice. And we pull permits where required. Shortcuts that void your material warranty or create code issues aren't shortcuts at all.
How It Works
Know Your Roof Cost Before the First Call.
We measure your actual roof from satellite imagery and hand you a price range in about 30 seconds. Real square footage, real pitch, real numbers. No phone call, no salesperson. Just your address.
No obligation. No salesperson. Just numbers.
Why Homeowners Choose ERP for Replacement
Common Questions
Age and spread of damage are the main factors. If your roof is over 20 years old and you're seeing widespread granule loss, sagging, or multiple leak points, replacement usually makes more financial sense than continued repairs. We'll give you an honest assessment either way.
Most residential replacements in North Idaho take one to three days depending on roof size, pitch, and material. Metal and composite cedar shake run longer. We give you a realistic timeline before we start, not an optimistic guess. For a full day-by-day breakdown of inspection, tear-off, install, and cleanup, see our roof replacement timeline.
Yes. We handle the tear-off and full disposal. You won't be left with a pile of old shingles in your driveway.
Related Services
We offer roof replacement in Hayden, Coeur d'Alene, Post Falls, Rathdrum, Athol, Sandpoint, Liberty Lake, Spokane Valley, and Spokane.